

Overview
OneCLI connects AI agents to GitHub so they can read and write code, open pull requests, manage issues, and trigger workflows. The gateway injects GitHub credentials into API requests automatically. OneCLI supports two ways to connect GitHub:Quick example
An agent calling the GitHub API through the gateway, with no token management needed:Bearer token for API calls, Basic auth for git-over-HTTPS.
OAuth
Connect your personal GitHub account. The agent gets access to all repositories you can see.Setup
1
Go to Connections
Open the OneCLI dashboard and navigate to Connections > GitHub.
2
Authorize
Click Connect GitHub. You’ll be redirected to GitHub to authorize OneCLI. Review the permissions and click Authorize.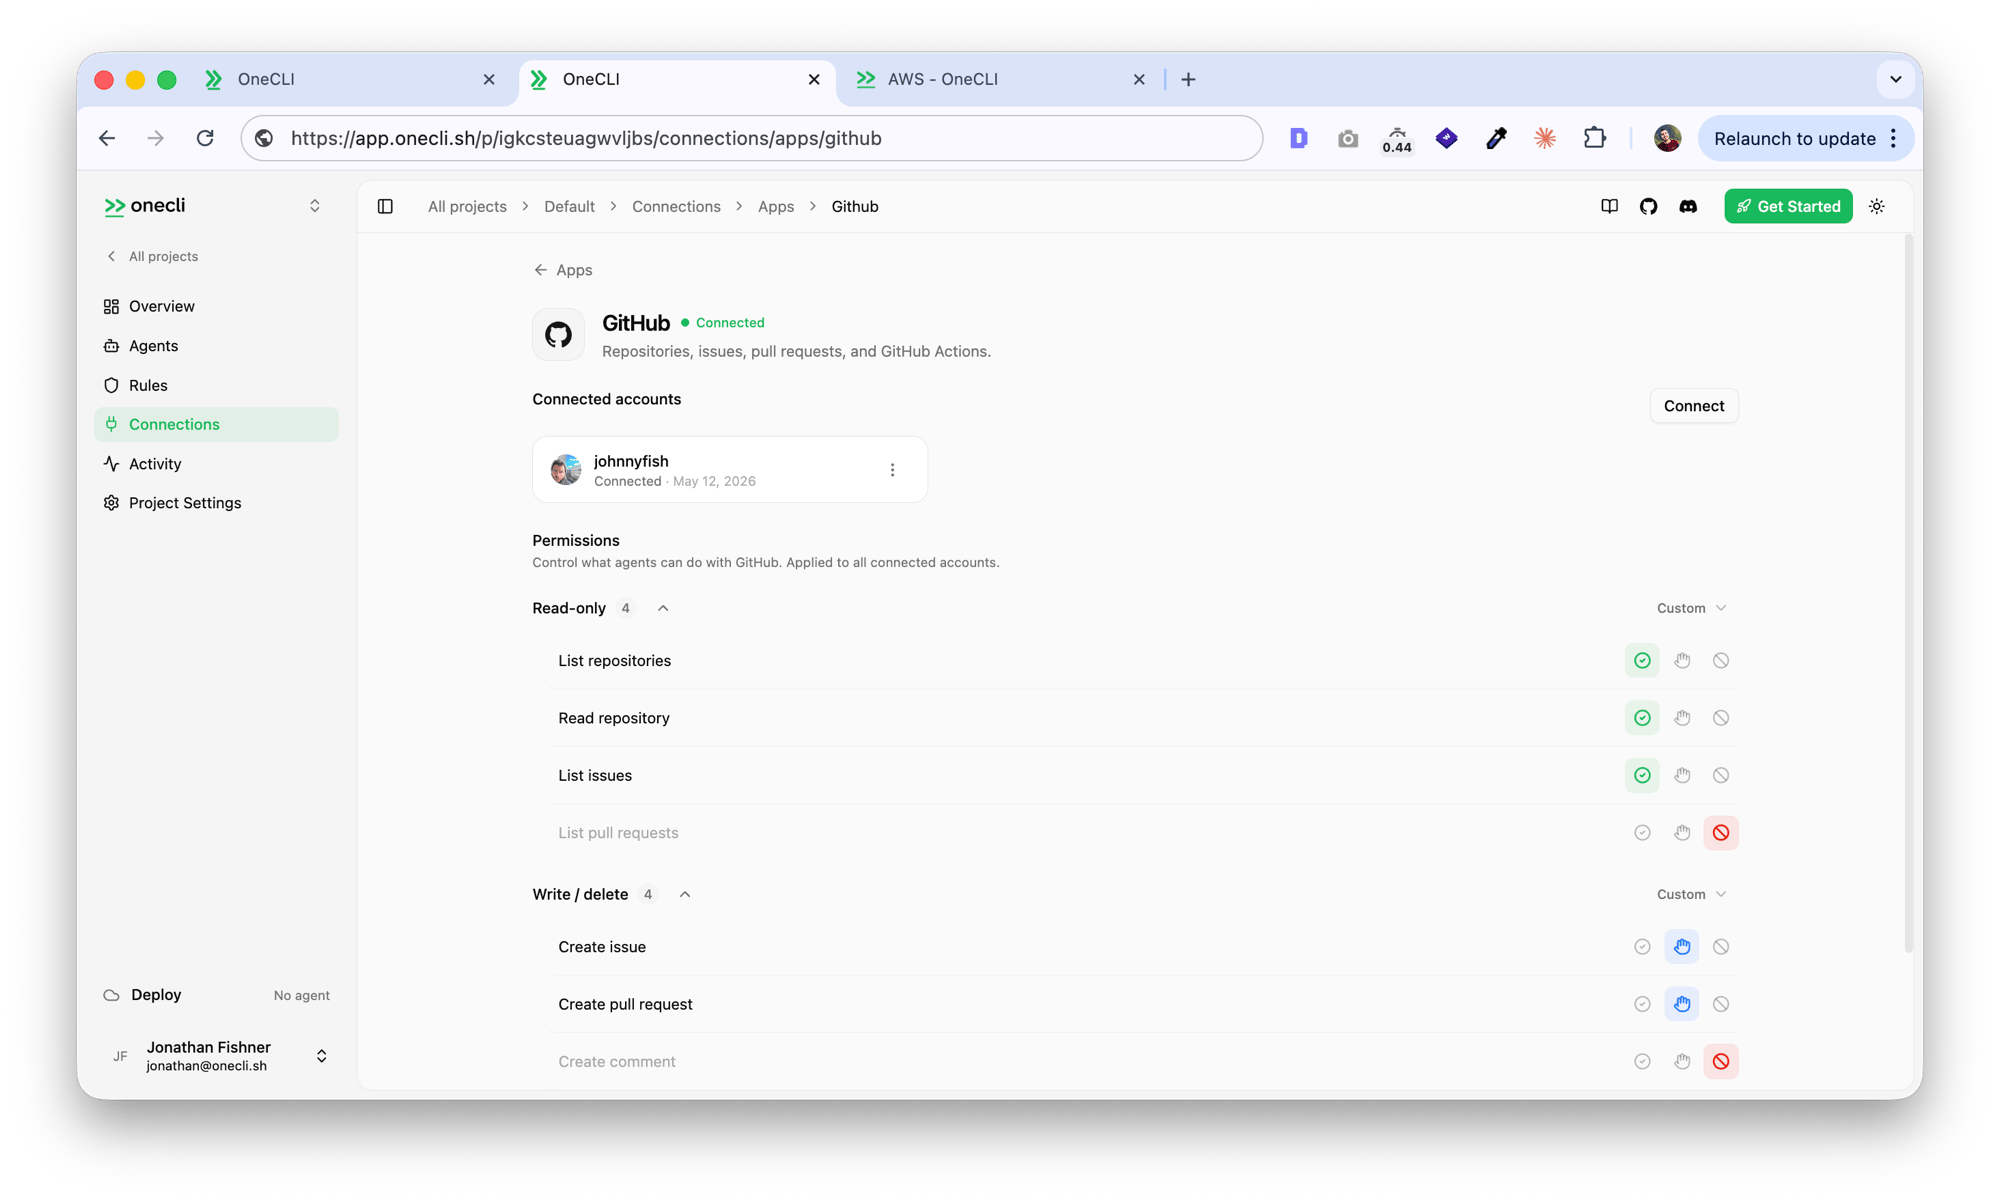
Permissions
The OAuth connection requests these scopes:How it works
- You authorize OneCLI via GitHub’s OAuth flow
- OneCLI receives a long-lived access token and encrypts it
- When an agent sends a request to
api.github.com, the gateway injects the token as aBearerheader - For git operations over HTTPS (
github.com), the gateway injects Basic auth credentials
Use cases
- Coding agents creating branches, committing code, and opening pull requests
- Agents reviewing PRs and leaving comments
- Triggering GitHub Actions workflows from an agent
- Reading repository contents during code generation
Limitations
- The token has access to all repositories you can see, not just selected ones
- No organizational visibility or approval flow
- Token is long-lived until you revoke the connection
GitHub App
For teams and organizations. A GitHub App gives you repo-level access control and organizational visibility. Org admins can see which repos are connected and approve or revoke access at any time.Setup
1
Go to Connections
Open the OneCLI dashboard and navigate to Connections > GitHub App.
2
Configure credentials (self-hosted only)
If you’re using OneCLI Cloud, skip this step. Platform credentials are pre-configured.For self-hosted deployments, create a GitHub App and enter your App ID, App Slug, and Private Key.
3
Install the app
Click Connect GitHub App. You’ll be redirected to GitHub where you can:
- Select the organization or personal account
- Choose All repositories or Only select repositories
- Review the permissions
Permissions
The GitHub App requests only the permissions your agents need:How it works
- You install the GitHub App on your organization or account and select which repositories it can access
- OneCLI receives the app’s private key and installation ID
- The gateway signs a short-lived JWT and exchanges it for an installation access token (1hr TTL)
- The token is injected into API requests and automatically refreshed when it expires
Use cases
- Organizations giving agents access to specific repos without exposing the full account
- Teams where admins need visibility into which repos agents can access
- Production deployments where token rotation should be automatic
- Compliance environments where long-lived tokens are not acceptable
Managing access
After connecting, you can change which repositories the app can access:- Go to Connections > GitHub App in the OneCLI dashboard
- Click Manage on the connection
- You’ll be taken to GitHub’s installation settings where you can add or remove repositories
Comparison
Per-action permissions
Once connected, the dashboard shows a permissions panel where you control what agents can do with GitHub. Each action has three modes: Allow (green), Ask (yellow, requires human approval), and Block (red, request is rejected). Read-only actions:
Write / delete actions:
Use the Read-only preset to allow all read actions and block writes, or switch to Custom to configure each action individually.
Controlling access
Both connection methods are per agent: grant the connection to each agent that needs it, choosing per tool what runs freely, what needs human approval, and what stays blocked — a read-only agent is a single grant. Organization rules add guardrails on top:- Rate limit API calls to stay within GitHub’s rate limits
- Require manual approval for destructive operations (e.g., deleting branches)
- Scope a connection to specific repositories with a session policy